Showing posts with label MCT: Build a Banner Kits. Show all posts

Wednesday, February 26, 2014

Beary Special Birthday

I bet you can hardly believe that I've had 3 posts in 3 days, me either ;). Today my friend Pam and I are having our cut challenge. For the first time we are using an SVG cut with our Silhouettes instead of a Cricut cut. We both have a Cricut and a Silhouette Cameo so I would imagine we will start doing a mix of cuts from both machines.

I chose the cut because I LOVE it and I have a ton of birthday cards I need to be making. This one will be for one of my nieces. This cut was one of Miss Kate Cuttables Freebie of Day cuts. It is no longer free but it can be purchased for 50 cents HERE. It is called Birthday Bear. I was SO impressed with how well the Silhouette Cameo cut the balloon string. It is so thin and cut BEAUTIFULLY.


I had heard all of these people raving about American Crafts cardstock and got some for a great deal recently. I really loved how it cut in the Cameo and I loved how easy it was to stamp on even with its pretty texture. 

I used PK-496 Everyday Character Face Parts by Peachy Keen Stamps to stamp my cute bear's face. I filled in the white spaces with my Sakura Gelly Roll pen and added some glossy accents to the eyes and nose. The adorable sentiment is from another Peachy Keen stamp set called PK-161 Happy Birthday BIG. It has a HUGE happy birthday sentiment and two smaller sized cute 'bear' birthday sentiments. I stamped this bear sentiment on the outside and the other bear sentiment on the inside. The piece I stamped the sentiment on is a die by My Creative Time. It is from the Build a Banner Kit I just lengthened it out to fit my sentiment. Then I added a seam binding bow to my bear and I was done. I hope you enjoyed my card. I can't wait to see what Pam did with this cut. 


Make sure to check out Pam's cut HERE! Have a terrific day! Hugs- Glora

Items Used:

PK-496 Everyday Character Face Parts 7″ to 9″PK-161 Happy Birthday – Big 

Build a Banner Kit

Sunday, February 16, 2014

Upcycle Valentine

Oops, I had this scheduled to post (but hadn't finished up my post yet). I was going to finish it up and post it last night but we had this explosion of some sort at our little power substation down the street and lost all of our power for a few hours. My family actually saw the 'explosion' happen as we were driving home from my parents house. It was kind of scary. I decided to go to bed and forgot all about this post during the craziness of it all. I got up this morning (thankfully to having power again) and got ready for church and got home from church a bit ago and saw that I had a sweet little comment on this post and realized that OOPS I didn't finish the post. Haha, so there is your random story for the day.

I made this for a sweet friend that goes to my church. She is a mom of three grown boys that live away from home and she is divorced. She had mentioned that she wasn't super excited about the upcoming 'LOVE' holiday and I wanted her to know that she is VERY loved. She is such a sweetheart and I wanted her to know that me and my family were thinking of her and hoping she was having a good day.


The little circles/messages on the bottom of the kisses is ABSOLUTELY NOT MY OWN. I've seen people do these for quite a while now and thought I would try one too. I saw Peachy Keen's designer, Emily's, cute kisses with the new Kawaii Face stamps by Peachy Keen on them and knew I had to use a few of those for mine too. You should check out her SUPER cute post HERE. 

I used LOTS of My Creative Time products for this upcycle project (9 to be exact). The tube was from a tube of mini M and M's from Christmas. I washed it up and then decorated it. I used the Fun Stitched Edges for the scalloped bottom layer and some patterned paper on top of that. I used some pretty twine at the top and bottom too. I attached one of My Creative Time's Teeny Tag Dies with a sentiment from the Teeny Tag Holidays. I used the Build a Banner Dies for the circles on the bottom of the kisses. I dressed up those circles with sentiments/images from the following stamp sets by My Creative Time: Any Day Bingo and Crossword, You Had Me at Chocolate, Postcard Add Ons, Turn That Frown Upside Down and Chocolate Greetings.

Since I used more than 8 My Creative Time products on this I wanted to enter it in their current designer challenge HERE. I'm also linking it to the linky party at Peachy Keen Stamps since I used face stamps from the newest release. You can find that linky party HERE. Hugs- Glora

HERE are the QUICK LINKS:


Teeny Tag Layering DiesBuild a Banner Kit
Chocolate Greetings Stamp SetTurn That Frown Upside Down Stamp Set

You Had Me at Chocolate Stamp SetTeeny Tag Holidays

Postcard Add-Ons Stamp Set
Anyday Bingo & Crossword Stamp Set
PK-1370 Kawaii Face AssortmentFun Stitched Edges

Saturday, January 25, 2014

It's a FROZEN Celebration!

I just wanted to share a fun poster and some cake decorations that I made. I love how these turned out and I hope you do too.

Here is the poster:


I used some new files from Lettering Delights for this poster. They are called Ice Princess and Ice Princess Party. I used the print feature of my Silhouette Cameo for these and I just hid the faces so I could stamp them with some Peachy Keen Face stamps. I used the Princess Face Assortment.

And for the cake:


For this one I used the same Lettering Delight Files along with the print and cut feature on my Silhouette. I once again stamped their faces with the Princess Face Assortment by Peachy Keen Stamps. I also used a bunch of awesome My Creative Time products on here. Emma came out with her Winter Flake Dies just in time. I also used the Build a Banner and All Around Birthday Time sets for the middle snowflake with the '5'. For the banner I used the Teeny Tags Layering Dies and the Anyday Bingo and Crossword stamp set, also by My Creative Time.


The celebration was a hit. I hope you enjoyed these too. Hugs- Glora

Pictures and links of stamps and dies I used for this project:


Friday, October 18, 2013

You're Sweet!

Today I am posting over at Peachy Keen Stamps and I wanted to show you a clean and simple note card. I love having something cute and simple (and not too bulky) on hand.


The darling pear and it's face along with the perfect sentiment come from the October 2013 Stamp Kit Of The Month. The cute little scallop circle is also a stamp. It is from the Clear Canning Pint Jar all from the newest release at Peachy Keen Stamps. I also used a My Creative Time Die from the Build a Banner Kit as well as some pretty coordinating twine from Timeless Twine called Watermelon Sorbet.

All this took was a little bit of stamping, cutting and gluing and it was done in a flash. I think it would be a great way to brighten someone's day and let them know how sweet you think they are.

I hope you are inspired to make some quick and easy note cards that you can send off to encourage or brighten up someone's day. Have a great day! Hugs- Glora

Thursday, November 15, 2012

MCT - Fontabulous November Blog Hop

Hello and welcome to another My Creative Time stamp and die release. This release is full of fonts and fun. I think you are going to just fall in LOVE with everything. If you came here from Cindy L.'s blog you are in the right spot, if not make sure that you head back to Emma's blog so that you can get the full hop in.

For my project I used the new Circle Font. I thought they would look really cute on a bath time layout for my baby.


I used the brand new Circle Font stamps with the circle from the Build a Banner set to create my title. I also used some of the circle dies as bubbles. The cute little baby is from the Baby Steps Cricut cartridge. I stamped the baby's face with the Critter Faces (large) stamp set and the duck's little eye was stamped with the Bird Faces and More stamp set by Peachy Keen Stamps.


These new font sets are AWESOME. I'm having so much fun playing with them.


As Emma stated in her video on Wednesday, she is offering a free CUTE stamp set "Thank You Hugs" to everyone who places their order by Sunday @ midnite! That will be the deadline to receive this FREE stamp set! (after that, I will offer it for sale) This is a little token of her appreciation for ALL of you who made this ALL possible for her to continue to do what she LOVES! Also to celebrate our 2 year anniversary! Yep, she came out w/her first set of stamps  2 years ago......WOW! 
This offer starts tomorrow, Thurs Nov 15th @ 8am PST & will end on Sunday, Nov 18th @ midnite! ONE per customer please! You do NOT have to add it to your cart or use a special code, we will just include it with your order! 


***BLOG HOP GIVEWAY ALERT***
For our Blog hop giveaway, there will be 2 winners chosen from ALL the comments combined!  You will win a "SURPRISE GIFT BAG FULL OF GOODIES" All you have to do is leave a comment here along w/the rest of the design team's blogs AND also leave a way for us to contact you!  Emma will use random.org to pick the lucky winners!  All you have to do is leave a comment on all blogs in this hop for more chances to win! The deadline is Sunday, November 18th at midnight! EASY PEASY!!! GOOD LUCK!:)

Your next stop is Katie!

Here is a list of the hop in case you get lost along the way:

Kim ~ http://www.scrapinmomofoneinspiringlittleboy.blogspot.com/

Wednesday, September 12, 2012

MCT 3D Wednesday - Baby or Wedding Shower Favors

Hi today is another 3D Wednesday at My Creative Time. For our project today we were to make a baby shower favor or a wedding shower favor. When I think favors I think quantity. I know that A LOT will need to be made so I tried to think of something quick to put together but cute too. Emma's products are just perfect for this sort of thing.

I got my inspiration for using the Bubblegum Treat Box this way from my MCT team mate Cassandra (See HERE). I also was inspired by one of her projects to layer the cute little baby feet from Anyday Bingo and Crossword inside the Build a Banner circle die and The Stitched Circle Die (see HERE). Thanks Cassandra.

Here is my favor:


The My Creative Time products that I used are: Anyday  Bingo and Crossword (baby feet), Build a Banner Kit (small circle die), Scallop and Stitched Circle Dies (larger circle), All Around Everything stamp set (Welcome Sweet Baby sentiment), Bubblegum Treat Box Die (the box). The paper comes from the DCWV : Citrus Stack and the hemp twine comes from Liz's Paper Loft Boutique.

I can't wait to see what everyone else made. I'm certain that it is ABSOLUTELY FABULOUS!!!! Make sure you stop by the My Creative Time Blog to check it out. Hugs- Glora


Items Used:

My Creative Time stamps - Anyday  Bingo and Crossword
My Creative Time stamps - All Around Everything
My Creative Time stamps - Build a Banner Kit
My Creative Time Dies - Scallop and Stitched Circle Dies
My Creative Time Dies - Bubblegum Treat Box Die
Hemp Twine from Liz's Paper Loft Boutique
DCWV: Citrus Stack


Monday, September 3, 2012

Scrapping the Little Things at My Creative Time

Today we are 'scrapping the little things' over at My Creative Time. A lot of people are into smash books and Project Life right now and both of these things encourage us to scrape the little things in our lives not just the big things.

Well I'm way behind on my scrapbooking so I figure if I'm going to add the little things in and not just the big things I'm going to have to figure out a way to do it quickly and easily. And that is exactly what this project was quick, easy and clean looking.

I decided it would be fun to do a page up of our recent school shopping experience. My youngest girl LOVES Minnie Mouse to pieces so her shoe and clothing selection did not surprise me at all. I figure that this page will go really cute next to a page with her dressed up in her new outfit and I will add some journaling to the other page too.


 I designed the whole layout on my computer and then printed it out on matte photo paper. I mounted it on a piece of black cardstock and then added some awesome My Creative Time products to make it just right. The My Creative Time products I used to make this layout are: Just Simply Live stamp and die set, the Build a Banner Kit and the Anyday Bingo and Crossword stamp set.

Make sure to stop by Emma's blog to see the awesome layouts that Emma and the design team made. Have a terrific day! Hugs- Glora

Items Used:

My Creative Time - Just Simply Live
My Creative Time - Build a Banner Kit
My Creative Time - Anyday Bingo and Crossword

Friday, August 17, 2012

My Creative Time August Release Blog Hop

Yay, the day is finally here and you can purchase all of your favorite stamps and dies from the My Creative Time August release. If you came here from Cindy B's awesome blog then you are in the right place if not make sure that you start back at Emma's blog so that you don't miss out on anything.

Today I have a couple of projects to share with you.

First of all we are planning a winter trip to Disneyland. I thought it would be fun to give my children some souvenir cash inside a cute little pocket card. I used the ornament die from the Warm Holiday Fun stamp set, the straight black line is also from that set. To make my ornament a Mickey ornament I cut 2 little circles from the circle die in Emma's Build a Banner Kit. The card was made using the  3x3 Tri-Fold Card die that is included with the Card Sentiments set. And last of all the sentiment came from the It's a Magical Season stamp set.


Here is what it looks like opened up. I just glued the sides down to make a little pocket for the souvenir money.


I also made a scrapbook layout that could be used for the upcoming trip.This is an 8 1/2 x 11 sized layout. I just love how it turned out and wish that this picture did it full justice.


Here is a close up of the tag.


This tag is one of Emma's Tag Dies and the sentiment comes from the It's a Magical Season stamp set. I stamped the sentiment in watermark ink and heat embossed it with red tinsel embossing powder. This stuff is SUPER sparkly in person. I love how it looks. I tied it off with some pretty red and white twine.

Here is a closer look at the Polaroid dies that go down the left side.


I did the same thing to make these Mickey ornaments as I did on the cash card above. I cut the pieces out using some pretty Core Couture Glitter cardstock by Core'dinations. It is also super sparkly in person. The middle picture of Mickey and Minnie with Santa actually came from some sheets of stationary I bought at Disneyland a few years back. The 'believe' sentiment came from the From Our Family to Yours stamp set. The fancy edged Polaroid die comes in the new Just Simply Live stamp set.

And last of all here is a closeup of one of the ornaments in the Polaroid die.


This is the set that inspired my blog hop projects today. It is called It's a Magical Season.


***BLOG HOP GIVEWAY ALERT***
For our Blog hop giveaway, there will be 2 winners chosen from ALL the comments combined!  The 1st prize is: A guest design spot for our next release in Sept & the 2nd prize is you can pick $50 worth of products from the "My Creative Time" store! All you have to do is leave a comment here along w/the rest of the design team's blogs AND also leave a way for us to contact you!  Emma will use random.org to pick the lucky winners!  All you have to do is leave a comment on all blogs in this hop for more chances to win! The deadline is Sunday, August 19th at midnight! EASY PEASY!!! GOOD LUCK!:)

Your next stop is Jeanne. Click HERE to go to Jeanne's blog.

Here is the rest of the blog hop line up just in case you get lost along the way. Have a great day and thanks for stopping by! Hugs- Glora


Sunday, December 11, 2011

MCT 12 Days of Christmas Day 11

Hello and welcome to the 11th day of Emma's 12 Days of Christmas. If you arrived here from the talented Cindy's blog you are in the right spot. If not make sure to start at Emma's blog.

Today I have a card for you. I used a sketch that they are using over at the Peachy Keen Challenge Blog. Sometimes I think it really helps to get some inspiration from a sketch that is all drawn up and ready for you to use.


For this card I used one of the dies from Emma's Build a Banner Kit along with a sentiment from the Mixed Holiday Sentiments stamp set. The darling  snowman is called Snow Girl and she coordinates with the Winter Character with Stocking Cap die. This is my first time using this die and stamp and I love how simple the die made it! I paper pieced most of the snowman but I did color in her pants with some Copics. The paper pad I used is called Be Merry by My Minds Eye. I noticed that Janice used this same paper pad for hers and I think it was a great choice. There are so many pretty double sided papers in this little pad.

***12 Days of Christmas Give Away Alert***
To qualify for ALL the AMAZING giveaways for the next 12 days, you must comment on every blog in this hop! You will have until Tues, Dec 13th @ midnight to have all of your comments in! VERY IMPORTANT, PLEASE LEAVE A WAY FOR US TO CONTACT YOU IF YOU ARE ONE OF THE WINNER'S!
There are some AMAZING giveaways for this special 12 day event & some SURPRISES to help celebrate "My Creative Time's" One Year Anniversary! Yep, Emma released her 1st set of stamps one year ago! So make sure you are tuned in because this is ONE hop you do NOT want to miss!;)

Your next stop is the very talented Jeanne.

And here is a blog hop list in case you need it:

Veronica ~ http://www.vkcreate.blogspot.com/

Items Used:

*My Creative Time stamps - Mixed Holiday Sentiments
*My Creative Time - Build a Banner Kit
*Peachy Keen Stamps - Snow Girl
*Peachy Keen Stamps Cut Out - Winter Character with Stocking Cap
*My Minds Eye - Be Merry paper pad
*Copics
*Stickles
*Glossy Accents


Saturday, December 10, 2011

MCT 12 Days of Christmas Day 10

Hello friends and welcome to the 10th day of Emma's 12 Days of Christmas. If you arrived here from the talented Cindy's blog you are in the right spot. If not make sure to start at Emma's blog.

Today, I have another ornament for you. This one took a bit more time than yesterdays, but I LOVE how she turned out I hope you like her too. She is a chipboard ornament set that I purchased from Peachy Keen Stamps (Gingerbread Chipboard Shape Set - Girl). I painted her with acrylic paint (nothing fancy there since I don't really know how to paint, I was mostly just trying to get the basic color of the gingerbread and then I inked the edges with some Tim Holtz Ink). Then I added some snow writer and glitter to the white pieces. I stamped her face with the darling Happy Lashes Face stamp and last but not least I added a darling little JOY banner using Emma's Build a Banner Kit.


***12 Days of Christmas Give Away Alert***
To qualify for ALL the AMAZING giveaways for the next 12 days, you must comment on every blog in this hop! You will have until Tues, Dec 13th @ midnight to have all of your comments in! VERY IMPORTANT, PLEASE LEAVE A WAY FOR US TO CONTACT YOU IF YOU ARE ONE OF THE WINNER'S!
There are some AMAZING giveaways for this special 12 day event & some SURPRISES to help celebrate "My Creative Time's" One Year Anniversary! Yep, Emma released her 1st set of stamps one year ago! So make sure you are tuned in because this is ONE hop you do NOT want to miss!;)

Your next stop is the very talented Jeanne.

And here is a blog hop list in case you need it:

Veronica ~ http://www.vkcreate.blogspot.com/

Items Used:

My Creative Time - Build a Banner Kit
Peachy Keen Stamps - Gingerbread Chipboard Shape Set - Girl
Peachy Keen Stamps - Happy Lashes
Acryllic paint
Tim Holtz Distress Ink
DecoArt Snow Writer
Glitter
Twine from the Twinery

Monday, December 5, 2011

MCT 12 Days of Christmas Day 5

Hello friends. I just got back from Disneyland and so I'm just joining in the fun of Emma's 12 Days of Christmas. If you arrived here from Cindy's blog you are in the right spot. If not make sure to start at Emma's blog.

Today I have a super simple project to share but a great one to make if you have little kids. It is a countdown to Christmas paper chain.


I always used to make these when I was a little kid and my children love them too. All I did was take 2 (12x12) sheets of glittery Core'dinations cardstock. I cut each sheet into 1" strips. Next I looped and stapled the first piece into a chain, then I linked the second one through the first one and stapled it. I continued linking and stapling until I had a link for each of the days until Christmas. I used the little starburst from the Build a Banner kit by My Creative Time as well as the numbers off of the All Around Birthday Time stamp set to finish off my countdown chain.


***12 Days of Christmas Give Away Alert***
To qualify for ALL the AMAZING giveaways for the next 12 days, you must comment on every blog in this hop! You will have until Tues, Dec 13th @ midnight to have all of your comments in! VERY IMPORTANT, PLEASE LEAVE A WAY FOR US TO CONTACT YOU IF YOU ARE ONE OF THE WINNER'S!
There are some AMAZING giveaways for this special 12 day event & some SURPRISES to help celebrate "My Creative Time's" One Year Anniversary! Yep, Emma released her 1st set of stamps one year ago! So make sure you are tuned in because this is ONE hop you do NOT want to miss!;)

Your next stop is the very talented Jeanne.

And here is a blog hop list in case you need it:


Veronica ~ http://www.vkcreate.blogspot.com/

Items Used:

My Creative Time - Build a Banner Kit
My Creative Time stamps - All Around Birthday Time
Core'dinations Cardstock

Wednesday, October 12, 2011

Whimsical Wednesday -"No Tricks Just Treats"

Today we have all made treat containers over at the Whimsical Wednesday Challenge Blog. We hope you will make a fun Halloween treat container and join in the challenge.

 This little milk carton was donated for our use from Regina at The Cutting Cafe and is called the Halloween and Fall Milk Carton Set. I don't have any other machine for electronic cuts other than my Cricut, but there was a pdf file and I just printed it off on patterned paper and cut it out by hand. It was super easy to cut out by hand, just straight lines and some scoring.


The little sucker and candy corn images are also from The Cutting Cafe, they are from a printable stamp set called Halloween Treats Just For You. The pretty crinkle ribbon is by Patsy at the Prairie Bird Boutique. The orange trick or treat circle is the Stitched Circle die by My Creative Time. The little starburst shape is a die from the Build a Banner Kit by My Creative Time and the sentiment is from the Mixed Holiday Sentiments by My Creative Time.


I hope you will stop by the Whimsical Wednesday Challenge Blog and see what all the other ladies have in store for you. I also hope that you will participate in the challenge. Regina from The Cutting Cafe has sponsored this challenge with 3 cut files. Patsy from the Prairie Bird Boutique is also sponsoring this challenge with a bundle of shabby crinkle ribbon. I hope you get a chance to play along in the challenge. Hugs- Glora

Items Used:

My Creative Time - Scallop & Stitched Circle Die
My Creative Time - Build a Banner Kit
My Creative Time - Mixed Holiday Greetings
The Cutting Cafe - Halloween Treats Just For You
The Cutting Cafe - Halloween and Fall Milk Carton Set
Crinkle Ribbon by Patsy at the Prairie Bird Boutique
Copic Markers
Crystal Stickles

Wednesday, October 5, 2011

Design Team Thursday at My Creative Time - Anything but a Card

Hello friends, today is a design team Thursday over at My Creative Time and we are all supposed to make anything we want, the only exception is no cards. I love to dress up cute little gift bags and had a lot of fun with Emma's stamps and some cute glittery Minnie stickers that my mom gave me.


I had lots of fun with this. I used Emma's XL Label Die, along with the coordinating border stamp on the Whimsical Calendar Days. The sentiments inside are from her Polka Dot Surprise stamp sets (one of my all time favorites). The little tag at the top of the bag is stamped and cut from the Build-a-Banner stamp and die set. And last but not least the Happy Birthday sentiment on the little tag is from the Many Greetings Stamp set. Other than that, the gift bag was from the dollar store, the stickers are Hallmark Stickeroni's and I added some doodling with my American Crafts Pen.

Thanks for stopping by today! I can't wait to see what Emma and the rest of the Design Team made for today, click HERE to see what everyone made! Have a wonderful day! Hugs- Glora

Items Used:

My Creative Time stamps - Polka Dot Surprise
My Creative Time stamps - Whimsical Calendar Days
My Creative Time stamps - Many Greetings
My Creative Time Dies - XL Label Die
My Creative Time Kit - Build a Banner
Minnie Stickers by Hallmark Stickeroni
American Crafts Pen
Twine by Trendy Twine

Thursday, September 15, 2011

Sneak Peek #4 - My Creative Time September Release

Welcome to day 4 of sneak peeks over at My Creative Time. Can I say that this new release has been SO much fun to work with. Today we are working with an AMAZING die and stamp set called Build a Banner Kit. It is FABULOUS!!!! I am seriously SO in love with this set!


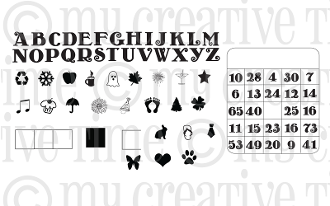
Do you see those beautiful polka dots and stripes on the main banner pieces? Those come with the stamp and die kit and are just the right size to stamp and then cut your pieces (they are 2x2 in size). In fact I also stamped the baby's outfit and blanket with the houndstooth background that comes in this kit! The kit includes 4 dies and 4 (2x2) pattern stamps. The letters in the middle of the banner do not come with this kit, but the alphabet that comes with the Anyday Bingo and Crossword set fit perfectly inside! I also used Emma's Scallop and Stitched Circle Dies along with the All Star Baby stamp set.

The darling baby is from the Baby Steps Cricut cartridge and to make it even cuter I stamped its face with the Just Baby Faces by Peachy Keen Stamps.

GIVEAWAY TIME!

Listen up "My Creative Time" friends! We are giving all of you an opportunity to win the BEST PRIZES during Sneak peek week with a total of "6" winners to be announced during Friday's Stamp release! All you have to do is leave a comment HERE along w/the rest on the design teams blogs for a chance! There are some AWESOME prizes w/this release!

1. SPREAD THE WORD TO THE WORLD ON FACEBOOK about this release & whatever connections you may have! Let us know on "My Creative Time's" FB page here that you did so! OR you can just tag me in your post! and.............

2. Just comment on ALL of the designers blogs EVERYDAY during Sneaky Peek week! THAT's ALL you have to do to qualify for the giveaways!;)

All winners will "randomly" get chosen and Emma will announce all six winners on Friday, September 16th @ 8am pst in her video during the release of this AMAZING new stamp collection & dies! GOOD LUCK! Log onto to your facebook now & lets start spreading word!;)

BONUS GIVEAWAY!

Because I am guest designing over at Everyday Cricut this week, Emma has generously donated her stamp set Pain Pain Go Away for me to give away. All you have to do is comment on THIS post by midnight on Friday, September 16th and I will randomly select a winner. So, if you haven't stopped by Everyday Cricut yet today please stop by to say "hi" and see what I made. Also, please make sure to drop by the My Creative Time blog to see what Emma and my design team sisters have made with this GORGEOUS Build a Banner Kit. Thanks for stopping by today! Hugs- Glora


Items Used:

*Baby Steps Cricut cartridge
*My Creative Time - Build a Banner Kit
*My Creative Time stamps - Anyday Bingo and Crossword
*My Creative Time Dies - Scallop and Stitched Circle Die
*My Creative Time stamps - All Star Baby
*Peachy Keen Stamps - Just Baby Faces
*Cuttlebug Polka Dot embossing folder
*Twine from Trendy Twine
>