I'm not ready for a video tutorial yet so I've tried to work up a picture tutorial for you all. I hope it makes sense and I hope you enjoy it. This is definitely not the only way to do this, it is just the way I do it. Do whatever works best for you and have fun. For my version of this card you will need either Design Studio or a Gypsy. Alright here we go.
Step 1: Add the card from the Wild Card cartridge. It looks like the image below.
Step 2: Flip the image (or rotate it 180 degrees).
Step 3: Hide all of the circles except for the little one right above the biggest one (this is where your brad comes through so your card can spin)
Step 4: Grab the image you are wanting to use. For these kinds I use images where there is a 'face shape' in the cut somewhere. For example this bunny below has a dashed line around his face that is because there is a 'face shaped' cut that would normally be layered on top of this.
Placement of the bunny is very important because 1: you need to have enough space under the face area for a small brad to move around without being seen. And 2: you also want to make sure this is where you will want the image when the card is put together because everything will need to line up perfectly with the little window or peek hole that the face cut makes.
Step 5: Grab the coordinating face shape (like the one to the right in the picture below). Then line it up with where it would belong on the bunny. Group the bunny and the face shape together so that when you move them away later they will stay together.
Step 6: Copy another face cut and line it up perfectly with the previous cut. You want this face shape to be 'grouped' with your card base and NOT with the bunny. Now you want to move the bunny away but leave the other face there. We want this to cut out because this is the peek hole for your card.
Step 7: Now you will want to lay all of the other coordinating pieces for the spinner card and bunny out on your mat how you would like them to cut.
Alright, how are we doing? Is everything about as clear as mud. I hope that the pictures are helping a little. Now we will continue on with the actual cutting and assembling.
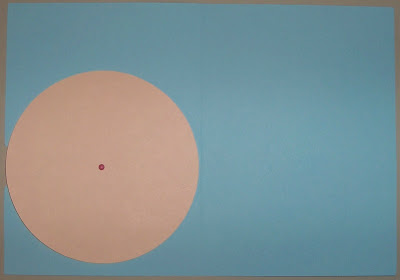
Step 8: Place your paper on your mat and cut it with your Cricut. I like to get everything cut at the same time if I can. Here is what my mat looked like before cutting:
and here are all the pieces for my card after it was cut:
I did make one extra cut because I wanted to show you the difference between 'our' special bunny and the one that would normally cut.
Step 9: Score and fold the card in half, then add the circle liner to the inside with a brad. (Side note: I like to add the brad pretty side up on the inside because the part on the outside of the card will just be covered up in the end - I think this makes it look nicer).
This is what the inside looks like:
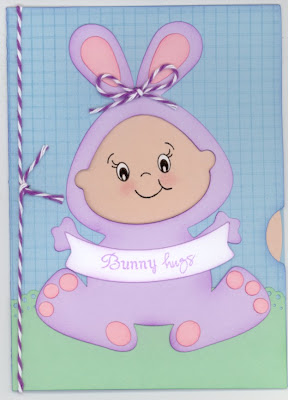
And here is what the front looks like:
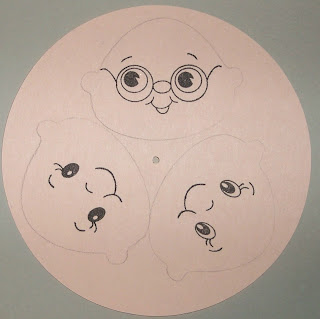
Step 10: Lightly trace around the face shape with pencil as many times as it will fit (make sure it is light because you will want to erase it later). After tracing the face shape on the skin colored spinner remove the brad and set aside for later.
Step 11: Stamp the faces you want to use.
Step 12: Erase the pencil tracings and color in the eye whites and then add rosy cheeks.
Now the liner is all ready to go. Now lets work on the rest of the card.Step 13: Ink the insides of the peek hole the same color as the top cut, in this case purple. You want to do this because you don't want the blue to show through when you put it together. Believe me this step makes a world of difference in the finished product. I inked around the whole bunny while I was at it.
Step 14: Assemble your bunny and decorate your card base (just make sure that you don't cover up any part of your window).
Here are my three main pieces ready for assembly:
Step 15: THIS STEP is VERY important. Make sure to attach the peach colored liner to the inside of the card with your brad again. It is important to add the liner before you attach the bunny because the bunny is supposed to cover up or 'hide' the brad. This is how your card will look now (kinda funny I know but it will look awesome after the next step).
Step 16: Adhere your bunny to the front of the card and voila you have a super cute and fun card that you won't want to stop spinning!
Here are pictures of each of the faces for this bunny...
Thanks for following along this super long picture tutorial. If you end up making one of these make sure to let me know so I can come and take a look. Have fun! Huge BUNNY HUGS - Glora
Items Used:
Simply Charmed Cricut cartridge
Wild Card Cricut cartridge
My Creative Time stamps - Color Me Happy
Peachy Keen Stamps - Critter Faces Large
Market Street Stamps - Perfectly Pretty Grid
Lilac twine from The Twinery
Martha Stewart Doiley punch
Inks for inking
Sakura White Gellyroll pen
Chalk


Great tutorial and cute card!
ReplyDeleteThanks for the tutorial and the super cute idea.
ReplyDeleteOh Glora, thank you so much for this tutorial. I wanted to make one so badly but did not understand the process. Now I understand it a little more. Thank you again!
ReplyDeleteYou are the BOMB my sweet friend!!!! I LOVE it!
ReplyDeleteBig Gypsy Hugs,
Emma;)
Awesome job on this tutorial Glora!! Thank you so much, I will be using it! Hugs, Cathryn67 :)
ReplyDeleteSo very cute Glora! Awesome tutorial!!!
ReplyDeleteThanks for the great tutorial, Glora! Your card is adorable!
ReplyDeleteGreat tutorial! LOVE the faces! :o)
ReplyDeleteMichelle
This is awesome!! Thanks for the info!
ReplyDeleteWoW! Great tutorial!
ReplyDeleteI wouldn't even be able to figure that out. You are super talented!
ReplyDeleteFabulous card! You did a great job on the tutorial! I figured this might be how you did it but thank you for confirming it. :)
ReplyDeleteThanks!
Pam
Simply-Pam.blogspot.com
This is just too adorable.
ReplyDeleteGaby
Too cute!tfs
ReplyDeleteWhat a GREAT tutorial, Glora! This is just too cute!!!
ReplyDeleteGreat tutorial! I love your card it is adorable!!
ReplyDeleteLove the tutorial. I can hardly wait to try and make one. My cricut had to go to the shop and I'm going through cricut withdrawals. As soon as I get it, I'm gonna make one of these.
ReplyDeleteThanks
Sherry
upordowntheyrebeautiful.blogspot.com
Wow ... great Tuto ! Thanks for sharing with us !
ReplyDeleteThanks for commenting in my blog,
Have a great Easter ;-)
~Maria Elena~
http://mariaelenaworld.blogspot.com/
Awesome tutorial, Glora! I've been wanting to make one of these ever since I saw Nikki's and then yours. You made it look so easy. The card came out adorable.
ReplyDeleteHugs,
Saundra :)
Very Cute!!! I love it. I'm going to have to try one of these soon. Thanks for the tutorial. I found it very helpful.
ReplyDeleteOh my gosh my friend this is sooo BEAUTIFUL!Way too cute for words,Super job on this Amazing project girl!LOVING IT! Have great Easter weekend! =:)
ReplyDeleteAwesome tutorial and super cute card! Tfs and have a great day. :)
ReplyDeleteYour tutorial was perfect and your project awesome. What a great card. Thank You for sharing in the hop.
ReplyDeletequilt 4 fun 2 at hot mail dot com
This is sooooo cute!! I love how you can change the faces. Awesome idea!! Thanks for the great tutorial!!
ReplyDeleteThanks for sharing. I've been wanting to make one of these spinner cards for a while. Also, what type of paper do you use for your skin colors?
ReplyDeleteLove it! Im trying to think of a way to use it in my kinder class... Behavior? Hummmm...
ReplyDeleteThanks for the great turtorial!!!
ReplyDeleteJust got a your story, & itching to try it out. I can see spinner pages in books for my 3 youngest(2,3,4) granddaughters Christmas boxes, or maybe all 13 grandbabies:):):).
dianne31331@gmail.com
What a pretty card I am going to have to try this one.Thanks for for the tutorial.
ReplyDeleteWhat a clever idea! I love the Peachy Keen faces and would love to own some - ditto for the new sayings stamps.
ReplyDeleteGreat tutorial! I actually think that I may be able to do this! Thanks!
ReplyDeleteThis is such a fantastic idea!!! I ♥ it! Thanks for sharing!
ReplyDeleteQuestion: For those of us who do not own the Gypsy or Design studio, do you think this could be completed using the cricut craft room?
Awesome tutorial! With those kind of pictures who needs a video? Love it! TFS!
ReplyDeleteKris in Alaska
funamom at yahoo dot com
.Very Helpful tutorial. I wondered what a spinner card was, now I understand and think I can do this.
ReplyDeleteGreat tutorial. I'm going to have to try one of these! Your card is soooo cute! I love the PKS faces. Adorable!!
ReplyDelete(:(:Smiles:):)
Robin
got it nice tutorial.
ReplyDeletecraftmethis@gmail.com
Very cute card! I have offten wondered how to do this. Thanks!
ReplyDeletecarousel_49091@yahoo.com
Lou Ann
That is just tooooo cute. I can't wait to make one!
ReplyDeleteVery cute idea! I belong to a paper craft club in my community and I will have to show them how this is made! They will LOVE it!
ReplyDeleteGreat tutorial , Glora! I can't wait for some craft time to try this! TFS your talents with us!!
ReplyDeleteadorable card. thanks for sharing
ReplyDeleteDi in IL
What a great idea-thanks for the tutorial!
ReplyDeletejrugg@sctc.net
Thanks so much for this tutorial. You have made it so easy to understand. I like this kind better than a video, and don't care how long it is. Keep up the great work.
ReplyDeleteKarenV
This is the cutest card I've ever seen. TFS
ReplyDeleteJust adorable, could you make a video making a spinner card? I do so much better watching it put together verses following written instructions, you are so darn talented thanks for sharing.
ReplyDeleteWhat an adorable card!! Thanks so much for the instructions. I guess I finally need to invest in a few Peachy Keen stamps. Absolutely sweet Easter card, that could be made for all kinds of occasions. Love it, love it, love it!!
ReplyDeleteGlora, what an adorable card. I love it. Those faces are so sweet. Great job.
ReplyDeleteI have been trying to figure out how to do spinner cards. Now thanks to your tutorial I finally get it! Too cute! Thanks! :)
ReplyDeleteThis is adorable and such a fabulous tutorial
ReplyDeleteCheers from Bangalore, India
Sonia
cardsandschoolprojects.blogspot.com